Optimal dummy security camera placement follows guidelines for height (7-10 feet) to deter intruders while maintaining realism and aesthetics. Use sturdy mounts, high-quality components, and adhere to 5-10 foot (1.5-3m) height recommendations for effective mock surveillance systems. Calibrate cameras for clear, even coverage, regularly checking footage to simulate real-world security functionality.
“Enhance your home or business security with our comprehensive guide on installing a mock surveillance system. Learn the art of selecting the perfect dummy camera placement, ensuring optimal coverage. Discover essential tools and materials for the job, along with expert tips on mounting techniques for various surfaces. Master the fine points of calibration to achieve peak performance. Get ready to transform your space with a secure, realistic security setup, all while adhering to crucial dummy security camera height guidelines.”
- Selecting the Optimal Dummy Camera Placement
- Measuring and Marking Mounting Heights
- Installation Tools and Materials Checklist
- Mounting Techniques for Diverse Surfaces
- Calibrating Your Mock Surveillance System
Selecting the Optimal Dummy Camera Placement
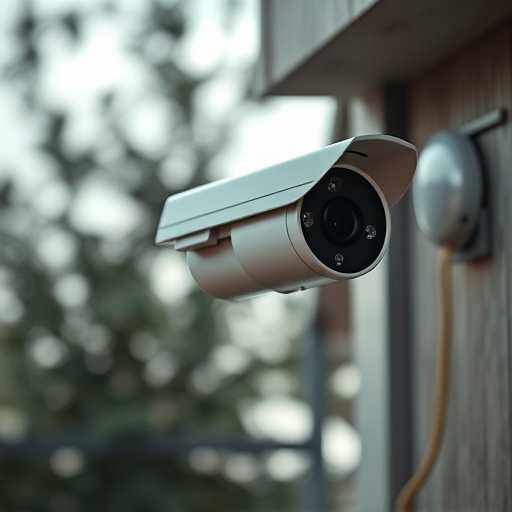
When selecting the placement for dummy security cameras, one of the critical factors to consider is height. Following the general dummy security camera height guidelines will ensure optimal visibility and deception. Typically, mounting them at eye level or slightly above (around 7-10 feet or 2.1-3 meters) provides a realistic and effective simulation. This positioning mimics natural human vision, making it harder for potential intruders to identify the system’s artificial components.
Avoid placing the cameras too low, as this may give away their fake nature, and positioning them too high might obscure important areas of interest. The ideal spot is often in plain sight but at a height that discourages easy manipulation or identification. These strategic dummy camera placements can significantly enhance home or business security while maintaining an aesthetically pleasing and natural appearance.
Measuring and Marking Mounting Heights
When setting up a mock surveillance system, accurate placement of your dummy security cameras is key for effective deception. Measuring and marking the mounting heights of your cameras according to real-world guidelines ensures both realism and strategic coverage. Start by assessing the area you wish to monitor, considering natural high points like windows, doors, and structural features that would be visible from an intruder’s perspective. Using a measuring tape, take note of these potential camera positions.
Follow dummy security camera height guidelines, which generally suggest placing cameras at heights between 5 to 10 feet (approximately 1.5 to 3 meters) above the ground. Mark these measurements clearly on your mounting surface to ensure consistent placement across all cameras in your system. This strategy mimics real surveillance setups, making it harder for potential intruders to identify and disable your mock security measures.
Installation Tools and Materials Checklist
When setting up a mock surveillance system, having the right tools and materials is essential for a successful installation. Here’s what you need to get started:
1. Dummy Security Cameras: Select cameras that align with your desired placement and realistic appearance. Consider factors like resolution, night vision capabilities, and weather resistance based on the areas you want to simulate monitoring. Remember to follow Dummy Security Camera Height Guidelines for a convincing setup.
2. Mounts and Brackets: Choose sturdy mounts suitable for the camera weight and type of surface where they will be attached. Wall-mounted brackets are common, but ceiling or pole mounts might be needed for specific scenarios.
3. Cables and Connectors: Ensure you have enough high-quality cables to connect each camera to a recording device or NVR (Network Video Recorder). BNC connectors and cables are standard for security systems.
4. Recording Device/NVR: This is the brain of your system, allowing you to store and review recorded footage. Consider its storage capacity and network connectivity options when choosing.
5. Power Supplies: Don’t forget power adapters compatible with all components to ensure every device receives adequate power.
6. Additional Accessories: Think about other essentials like weatherproof cases for outdoor cameras, remote controls, and software for managing the system.
Mounting Techniques for Diverse Surfaces
When installing a mock surveillance system, understanding different mounting techniques for various surfaces is key. For walls and ceilings, screw mounts are commonly used, offering stability and adjustability for optimal camera positioning. It’s crucial to adhere to dummy security camera height guidelines, typically placing them at eye level or slightly elevated, ensuring comprehensive coverage without causing discomfort or obstructing natural lines of sight.
Surfaces like windows, doors, and mirrors require specific brackets designed to overcome their unique challenges. Window mounts, for instance, often employ suction cups or secure adhesive for easy installation, while door mounts leverage hinges or magnetic strips. Each method ensures the dummy camera remains securely in place, providing a realistic security presence across diverse environments.
Calibrating Your Mock Surveillance System
Calibrating your mock surveillance system is a crucial step to ensure optimal performance and accurate simulations. Start by adjusting the dummy security camera height according to real-world guidelines. Typically, cameras should be positioned between 1.5 to 2 metres (5 to 6 feet) above the ground for clear and detailed footage. This standard height offers a balanced field of view, capturing both close and distant objects effectively.
Remember, consistency is key. When calibrating, consider the layout of the area you’re simulating. Ensure that each dummy camera covers an equal portion of the space without overlapping fields of view. Regularly check the footage from different angles to identify any blind spots or areas with excessive detail. This meticulous process guarantees that your mock surveillance system replicates real-world security camera functionality, enhancing the realism of your simulation exercises.
After carefully selecting camera placement, measuring mounting heights, gathering necessary tools, and mastering diverse installation techniques, it’s time to calibrate your mock surveillance system. Following our comprehensive guide on dummy security camera height guidelines and installation practices ensures a robust setup that provides the appearance of comprehensive monitoring without the actual cost and complexities.